Essential Components and Tips for a Successful Van Solar System Installation
Are you thinking about going solar but overwhelmed with all the calculations and necessary components? Here’s everything you need for an awesome van solar setup.
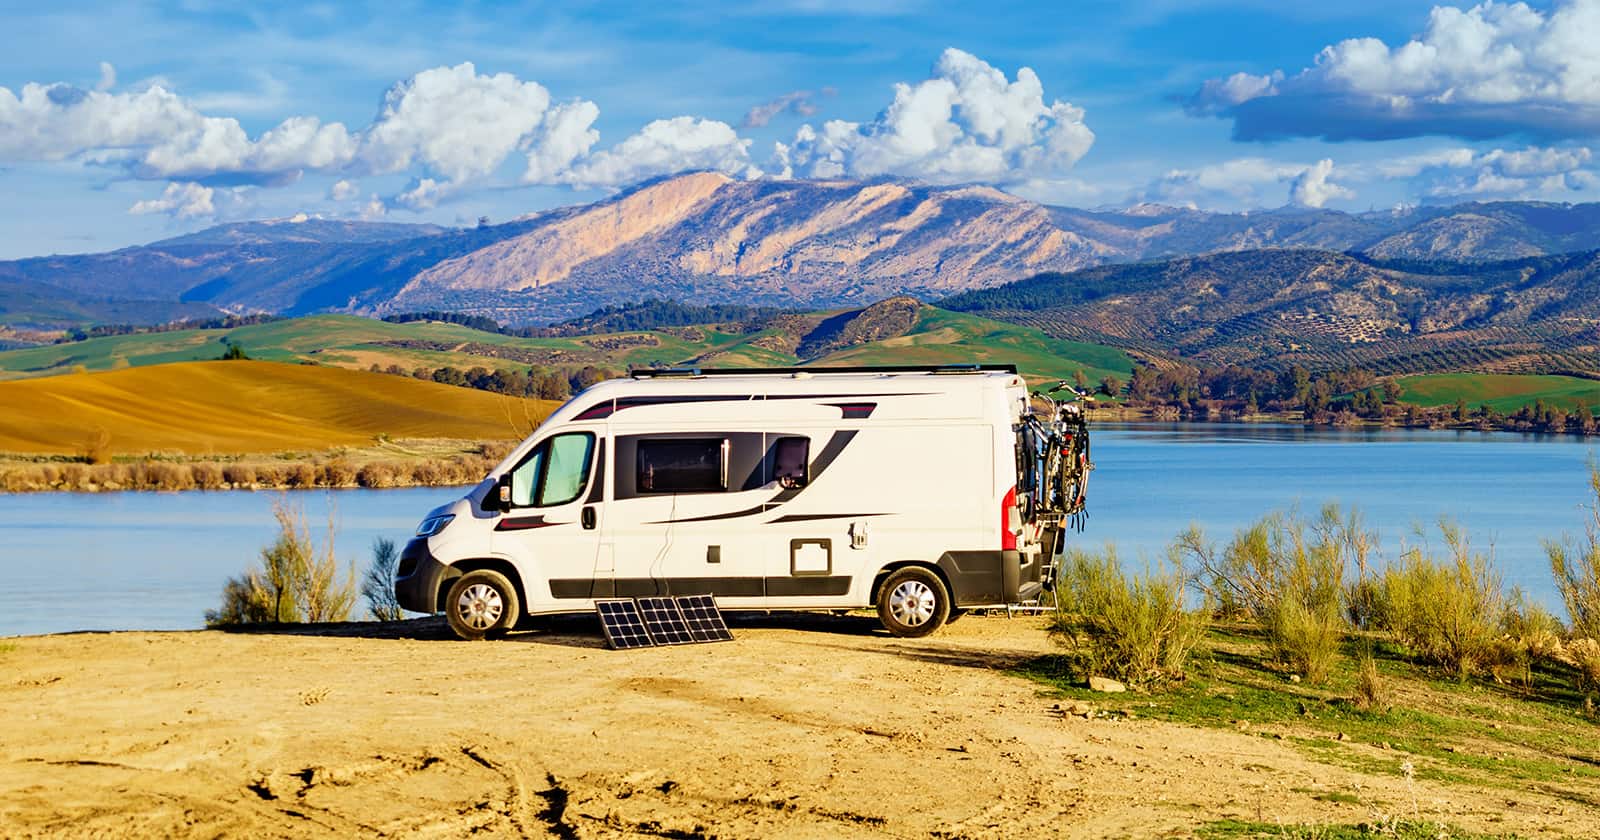
Vans are the ultimate go-anywhere adventure vehicles that, combined with a solar setup, become the ultimate freedom vehicles.
Having the ability to convert all that sun shining down on your van’s roof to usable power makes sense. This is why so many van builds include solar setups as their primary source of power. Solar unquestionably is a smart decision for vans. However, putting together all the necessary components can be a complicated process.
What Makes Up a Solar Setup?
Each van build will have its own power requirements ranging from charging a laptop and turning on a few lights to powering an entire condo on wheels. The power needs will vary, but the essential components needed for a solar setup will be similar.
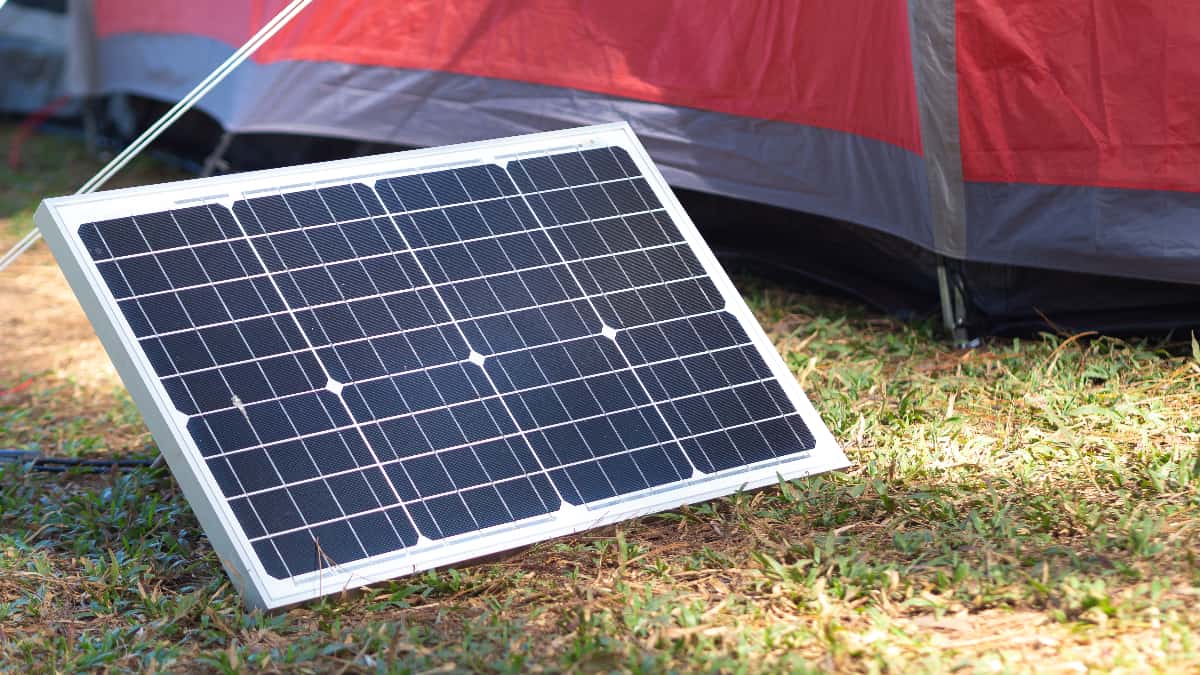
Solar Panels
This is the main component and the one thing everyone knows they need. Solar panels come in two types, monocrystalline and polycrystalline.
Manufacturers produce monocrystalline panels by cutting down a single pure silicon crystal into individual cells. They melt multiple silicon crystals together to make polycrystalline panels. Monocrystalline panels are generally more efficient but also more expensive than polycrystalline panels, which are cheaper but less efficient, thus requiring more panels to generate the same amount of energy.
When choosing solar panels, you must decide between flexible or rigid options. Flexible panels are less rigid but are often less efficient than rigid panels. Although the flexible style is less expensive, it is also known to be problematic. Your power requirements and budget will determine the best option for you, just as with the type of panel.
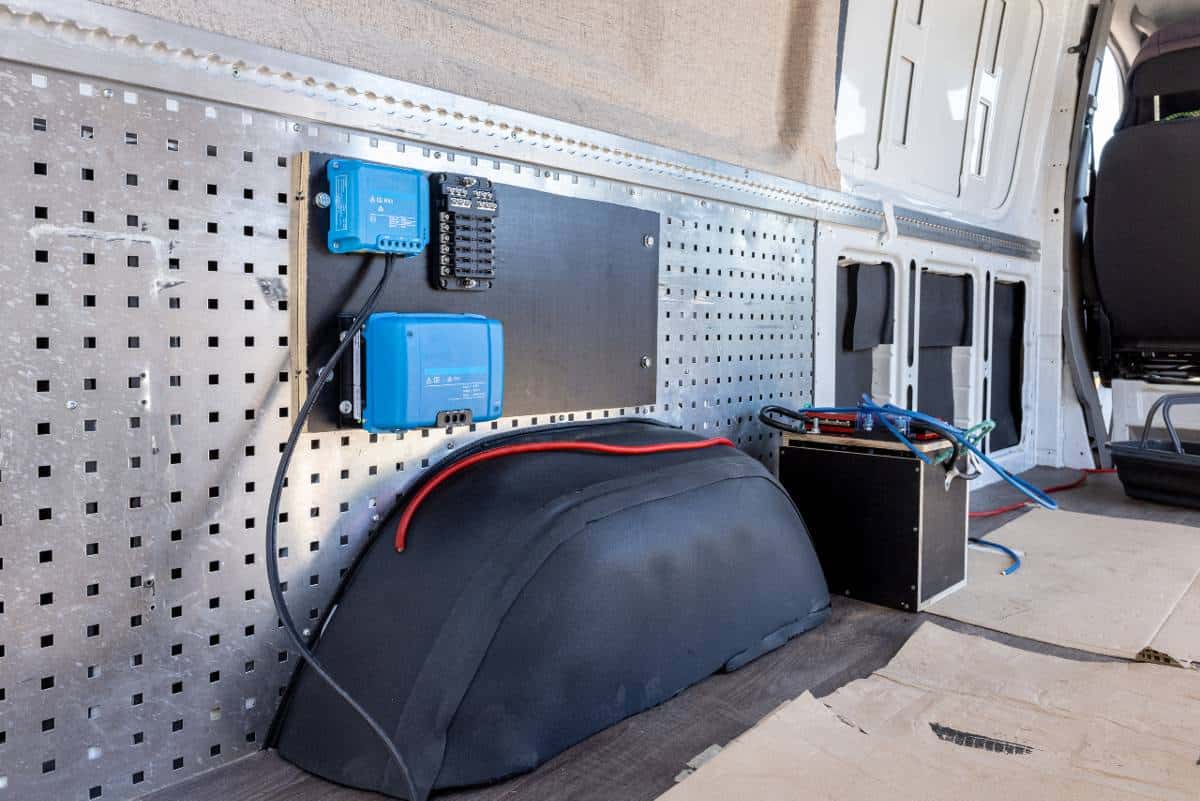
Solar Controller
The solar controller is a small box that monitors the solar setup. Its primary job is to regulate the voltage and current generated by sola r panels.
Most van battery banks will have batteries with an operating range of 13-15 volts. The function of the solar controller is to ensure that the batteries are not overcharged and that the charging process is properly regulated.
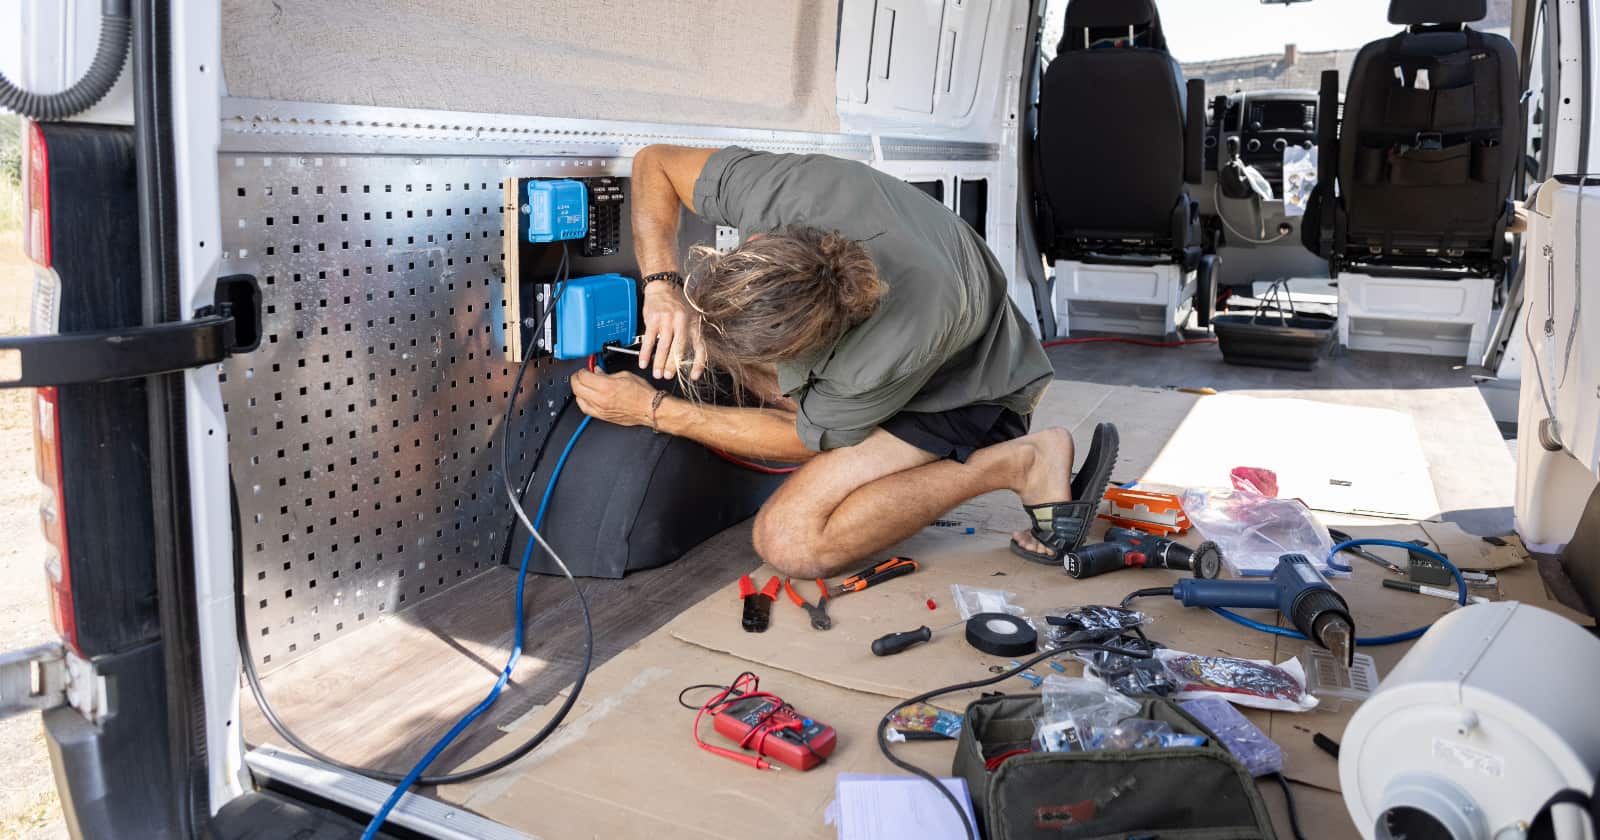
Batteries
As solar panels capture and generate energy, it becomes necessary to have a storage system, which is where batteries come into play. There are different types of batteries available, and some ratings related to storage capacity are important.
The most expensive component in a van solar setup is typically the batteries, which are crucial for storing energy. If you have high energy requirements or want to store energy for longer periods, investing in higher-quality batteries would be advisable.
Inverter
Inverters convert DC power stored in batteries into AC power, which is necessary to power many electronics such as laptops, coffee makers, and household items.
Although not all systems need an inverter, using one is essential to expand your power options beyond DC 12-volt power. While some accessories are available in 12-volt versions, such as small fridges, fans, and lights, as well as adapters for AC chargers, the absence of an inverter will restrict your power sources.
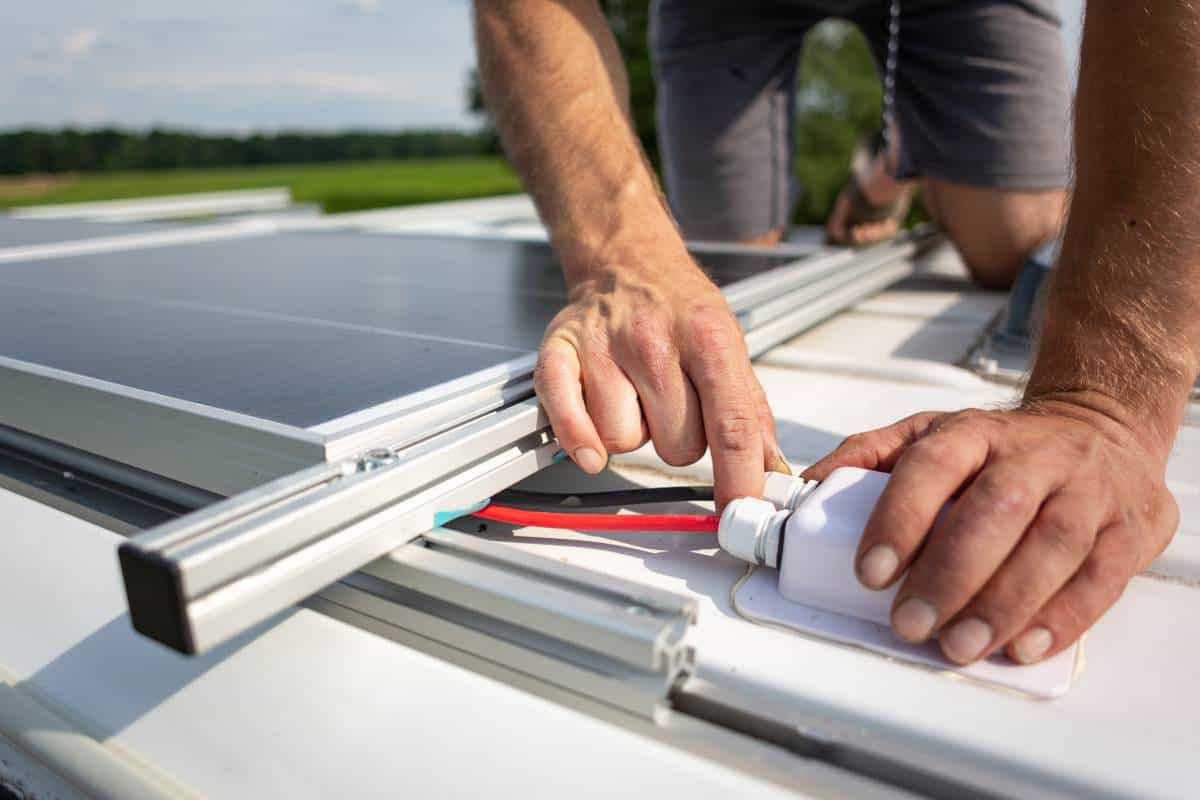
Cables / Connections
The wiring in a basic solar setup is actually not that complicated. Manufacturers often make the systems in a plug-and-play style.
The panels are connected to the isolation or shut-off switch, the solar controller, batteries, and a series of other safety components and accessories. The majority of these connections are made most commonly using one red and one black wire.
Many companies simplify wiring the entire system by using quick-connect fittings on these wires. Also, the connections to items such as inverters or chargers are external, requiring no splicing of wires.
Breakers / Fuses
Including breakers and fuses as safety items in every solar setup is crucial. Breakers and fuses are rated in amps and designed to cut power safely when their rating is exceeded.
Breakers, commonly used in residential settings, can be reset after they are tripped. On the other hand, fuses, which are more prevalent in automotive applications, are one-time-use items as they are destroyed when they are exposed beyond their rating.
All systems should have a properly calculated main breaker and fused items where necessary. The size of the main breaker should be based on the total capacity of the solar system and should be calculated by a qualified electrician or solar installer. Preventing excess current from reaching your van’s electrical system or entering electrical accessories will prevent damage to components and potential fire.
Shut-Off Switch
Shut-off switches, or isolation switches as they are also known, are used to cut power to your solar system in emergency situations or for maintenance.
A shut-off switch should be located in such a way that it will cut power to the required components all at once, quickly and easily.
Calculating Your Van’s Solar Setup Needs
Before purchasing the necessary solar components, you must calculate your solar needs to determine the size or number of parts required for your solar setup. This stage often confuses and frustrates many people.
Nobody wants to be doing math formulas and calculating electrical consumption when they could be out living the van life. But you need to do some homework first. A weekend camping van vs. a full-time living van build will have two very different solar setups. It is essential when designing your solar setup to be realistic about your energy needs.
Factors to Consider When Calculating Your Energy Needs
- Power Consumption – Every electronic device requires a certain number of amps to operate. When you add up the required amps for all the items you want to use, this will be the total amp hours.
- Amp-hours – You can calculate your total amp hours by multiplying the total amps required with the number of hours per day you plan to use these items. Adding 20 percent to the total allows for fluctuations and is a good safety net to have.
- Required solar output – With your energy consumption calculated, you must now figure out how much solar it will take to fulfill these needs. You need to convert your total amp hours to watts since solar panels are rated in watts. Then, you’ll need to divide that number by the hours of sunlight your panels will receive, taking into account worst-case scenarios by adding an additional 20 percent.
- Average daily sun exposure – Solar panels are nothing without the sun and direct exposure to its power. The amount of sun exposure will change day by day as it’s dependent on the weather. However, an average of hours of daily sun exposure will determine how much energy you can capture.
- Battery capacity – All of the solar energy you collect needs to be stored; this is where your batteries come into play. The type, size, and number of batteries will dictate how much solar energy you can store.
What Does a Typical Van Solar Setup Look Like?
Now that you know what makes up a solar system and the calculations involved in planning it, it’s time to put the entire package together.
Let’s take a look at a basic setup for a campervan, including the components and the capacity of the system. Some common abbreviations you will see when calculating solar are W (watts), Wh (watt-hours), and Ah (amp-hours).
- LED lights (12) – 3W x 8hrs = 306 Wh
- Vent fan – 3W x 12hrs = 36 Wh
- 12-volt fridge – 55W x 6hrs = 330 Wh
- Laptop – 65W x 4hrs = 260 Wh
- water pump – 55W x 0.5hr = 27.5 Wh
- Coffee maker – 750W x 0.25hr 187.5 Wh
- Inverter – 20W x 5hrs = 100 Wh
- Smartphone – 10W x 2hrs = 20 Wh
- Diesel heater – 20W x 4hrs = 80 Wh
- Blender – 250W x 0.05hr = 12.5 Wh
When we add all this up, we have a total of 1359.5 Wh of power consumption per day. This number is then converted to amp hours by dividing it by the system voltage, which is about 12 volts for most systems. So that converts to 113.3 Ah in this case. This number is used to select the size of battery or batteries needed.
The battery selection will be based on 136Ah plus the recommended depletion rate for battery types. Extending the life of expensive batteries is definitely in your best interest. Not draining them below a certain level is the answer. Lead acid batteries, such as AMG style, should stay above 50 percent. Lithium can be drained to 20 percent.
For example, a 200Ah AGM battery will have usable storage of 100Ah while a 200Ah lithium would have 160Ah.
Putting It All Together
In the above example of a typical campervan setup, we’ve calculated our solar needs and are ready to start buying pieces. We require 1630 watts or 136Ah of energy per day, so our component selections will be based on this.
When it comes to battery selection for your solar setup, you want to again add room for worst-case scenarios. What if you don’t have sunlight for a day or two? You want to have the stored power you need to sustain yourself in bad weather.
For daily sunlight, we will use 6 hours as a conservative figure to be on the safe side. The solar panels you select should be large enough to ideally fully charge your batteries every day. Your required wattage divided by the hours of sunlight will result in the solar panel required.
1630 watts of required power divided by 6 hours of sunlight gives you 271 watts of solar in ideal conditions. Add a cushion for real-world conditions, and you are in the range of 350 watts.
For the above scenario, your selected components could look like this:
- Solar panel – 175 watt (x2)
- Solar controller – 40A MPPT
- Battery – 200Ah lithium
- Inverter – 1500 watt
In addition to the main components, you will have your cables to connect everything, an isolation switch, fuses, and breakers where required.
What If I Outgrow my Solar Setup?
Carefully calculating your energy should be done before purchasing any equipment. You probably noticed that in each step of the calculations, there was always an extra added to the required amount. Overestimating your needs will ensure you end up with a solar setup that you’re happy with.
One great thing about solar is that as long as you have room for the panels, you can upgrade your power potential. The roofs of vans are the obvious location for panels. However, mobile panels or separate portable solar generators like Jackery products can also be used beside your van to increase solar area.
Solar power can be confusing and expensive in the beginning. However, the end result and freedom it offers are worth the time and money in the long run.
Continue reading: