Vans are small spaces and can become stuffy and warm without proper ventilation. If you are lucky, your camper van came equipped with pop-out back and side windows. Many vans, however, only have opening driver and passenger door windows.
Don’t worry if this is your van because swapping out your stationary windows for opening ones is an easy DIY project that will be a breath of fresh air!
I have a Ford Econoline van with a factory conversion so my interior pieces are slightly different from a stock Econoline. However, the swap will be very similar for most vans.
What Do You Need For Your Van Window Replacement?
The first and most important thing you need is the opening windows.
Stationary windows and pop-out or tilt-out windows look the same at first glance but they are different. Opening windows have a latch to open and close them. This latch is attached to the glass through a hole that fixed windows won’t have.
If you find used windows, they will most likely have the latches attached but if not, you will have to source these as well. The frame that is adhered to the glass, in most cases, will have small hinges at the top.
There will (most likely) be brackets for the latch mounting screws that will not be with your van. You will need these brackets.
Lastly, you will need to properly reseal your windows after the switch. So, new seals or a window sealer will also be required.
Required tools
This is actually a pretty easy DIY project and requires only basic hand tools. Here is a list of tools you should have on hand to complete your camper van window replacement project:
- Ratchet and 3/8″ (10mm) socket or wrench (size may vary by manufacturer)
- Multibit screwdriver
- Exacto knife or razor blades
- Interior panel removal tool (optional)
- Heat gun (optional)
- Goo Gone or alcohol (to clean the old, sticky seal off the glass)
That should be it. Again, depending on the van manufacturer, things may vary but the process should be very similar.
Time To Swap Your Camper Van Windows!
In most cases, you will be using windows from a parts van. That being said, it is a good idea before you go pulling windows out of your van to confirm you have everything to complete the job. Many years of vans will have the same parts, however, do a thorough check to confirm the glass, in particular, is the same size and shape. Check that nothing has been modified where it won’t work for you.
Van panel removal process
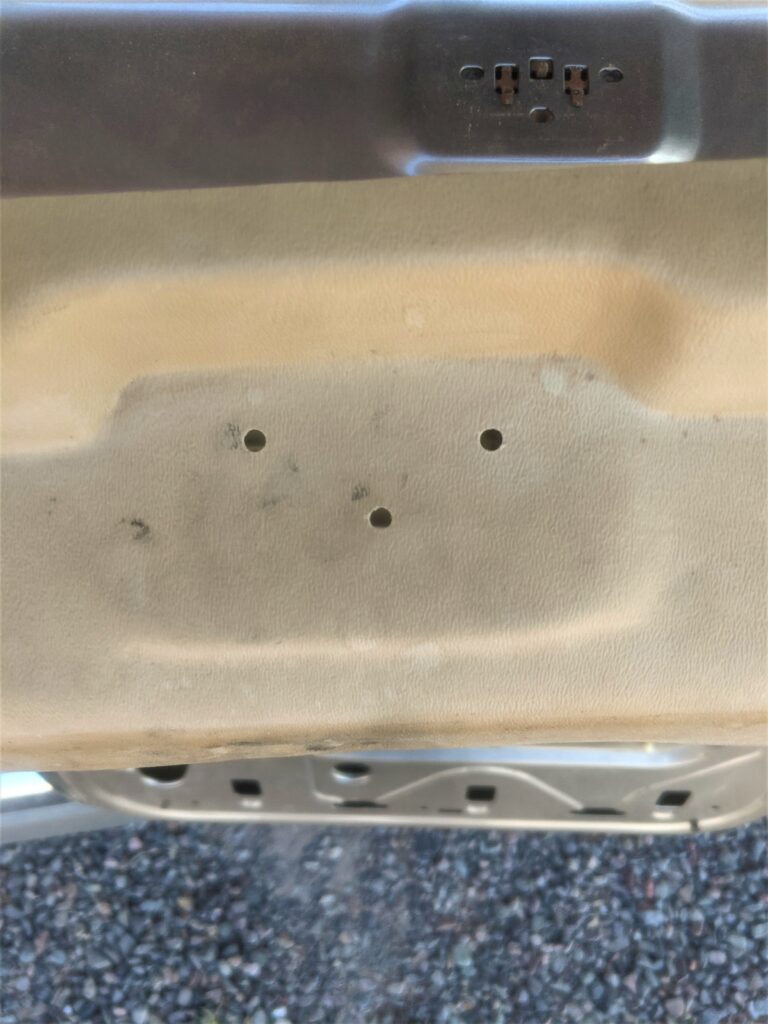
First, you will be removing the stationary windows from your van. To do this there are some additional interior pieces that need to be removed. Your door panels will be in place with push-in style plastic anchors, or in the case of my converted interior, screws.
The factory plastic anchors are attached to the backside of the panels and so you can’t see them. You will need to carefully pry on the door panel to locate where these are holding the panel in place. If you have the tool to remove these anchors, it slips underneath and allows you to gently pry back pulling them out. If you don’t have the tool. you can use a flat screwdriver or paint scraper to do the same job.
Panel removal tools are readily available and cheap. They do a much better job so it’s a smart investment.
In the case of modified vans, wooden trim pieces and window coverings may be screwed in place and will have to be removed before the door panel can be removed.
Door pulls and latches (in most cases) will also have to be removed before the door panel itself can be detached.
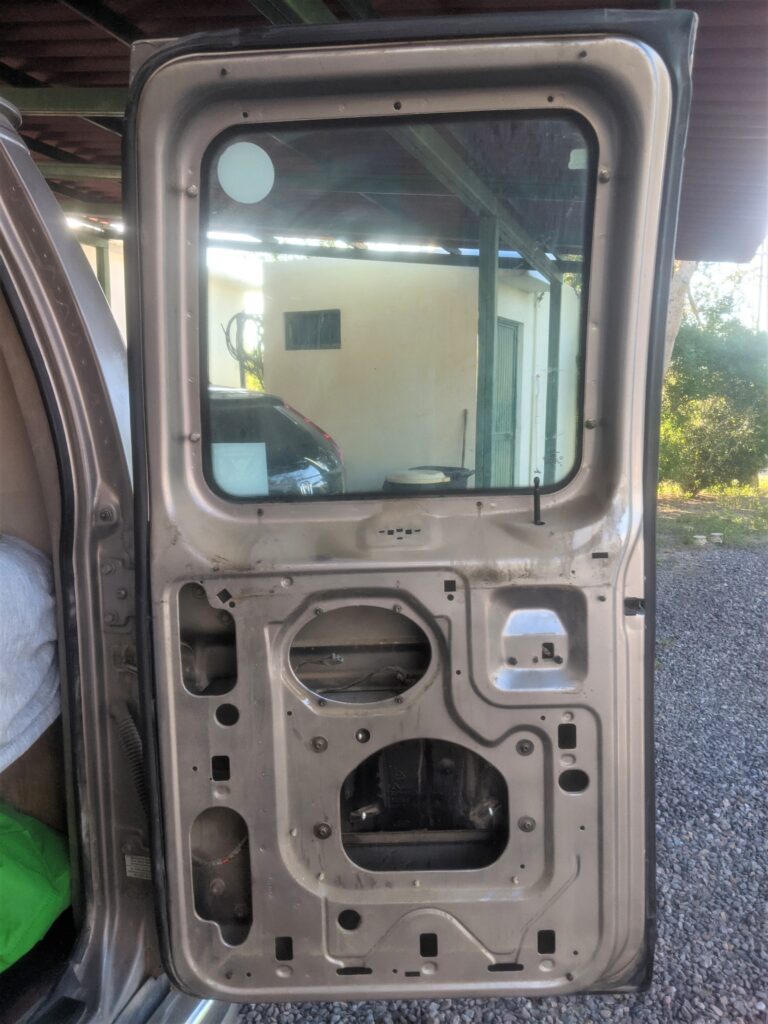
With the door panels removed, you will be able to access the rest of the hardware holding the van windows in place.
Van window glass removal
If you live someplace warm, parking your van with direct sun exposure on the windows to be removed can help soften up the seals. If not, using a heat gun around the edge of the glass will do the same.
The windows are held in place with special carriage-style bolts. The outside end on the glass is round with no place for a wrench. On the inside, will be a nut holding it in place. These nuts shouldn’t be overly tight but if the bolt on the outside of the glass spins it can be gently held with a set of vise grips.
Even with all the nuts removed the window should stay in place. The bolts and frame will likely be held in place with some sticky sealant.
The next step requires patience and a steady, gentle touch. If the seal is too hard, it could result in you applying too much pressure and breaking the glass. Heating the seal will make this step much easier.
If you have something plastic with a flat edge, that will work best here. You can use a flat screwdriver but avoid making contact with the glass. From the inside, push into the seal between the glass and metal door. Apply light steady pressure and gently push out until the seal slowly starts to release. Work your way around the window. The more seal that is released, the easier it will become.
Be patient getting the window started. It is best to have a helper on the outside to brace the window. If you are alone, move slowly and leave the top or bottom attached. This way you can move to the outside and remove the last bit of the seal and catch the window.
Cleaning
Now comes the not-so-fun part. The seal will leave some sticky black goo on the door and the windows. If the pop-out windows you are putting in are used, they will likely have this sticky black mess as well.
Products like Goo Gone are great for stubborn areas. A razor blade or paint scraper can be used to clean up the old seal. Make sure both surfaces – the windows and doors – are clean before proceeding.
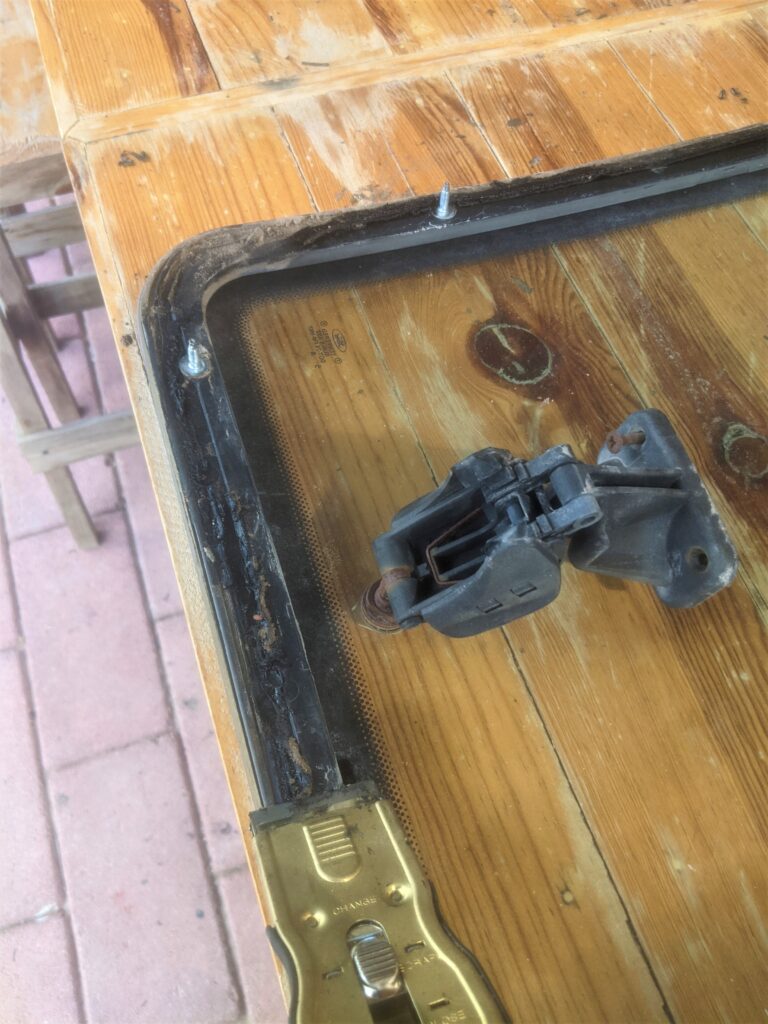
I chose to use butyl tape for my seals, as I had some leftover from an RV window replacement I did. You can purchase the factory-type seals if you wish. I’ve seen some people use various different sealant products that you apply similar to calking and silicone applications.
I’ve used butyl type in the past with good results and find it easy to work with and no mess.

Installing the new pop-out van windows
The opening, pop-out van windows will use different bolt locations than your stationary windows. This is no problem as the van door will have all of the holes pre-drilled for both styles of window.
With the new seal applied to the window frame, you can fit the window in place and press firmly to adhere the seal. Start a couple of the nuts to hold the window in place and then tighten them slowly a few turns at a time, moving from one nut to the next until they are secured but not overtightened!
Latch installation
That’s it for the glass. The latches are the next thing to be added. Whether your camper van came with opening windows or not, the door panels should have a molded area to attach the latches. The cutouts for the plate they screw to will be in the door but you will need to install the metal plates. They simply slide in place from underneath and then are held in place with the attached tabs.
Depending on which door you are changing the window in and what make of van you have, you may have to remove speakers to get your hand inside the door to put the bracket in place.
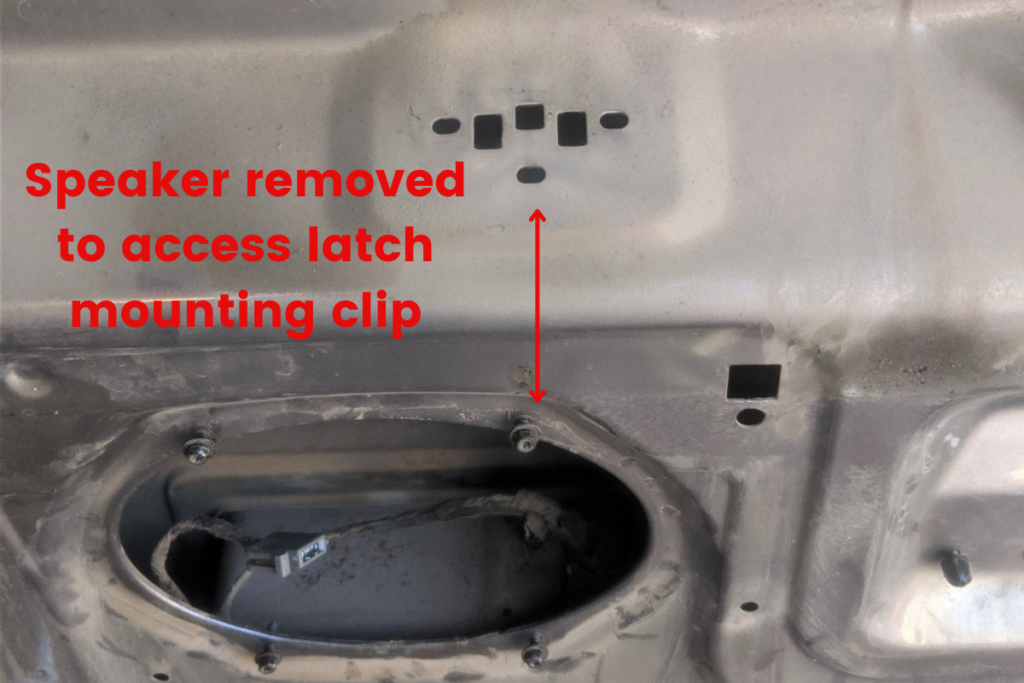
With the brackets in place, you have the location of the screws that attach the latches to the door. Your door panels will have the flat molded spot for the latch as mentioned above but they will not have the screw holes.
I placed the door panel in place and used a sharp nail punch to mark the screw holes on the backside of the door panel. I then drilled the required sized holes in the panel.
Confirm that the holes line up between the latch, door panel, and mounting bracket and you can reinstall the door panel.
The latches are held in place from the outside with screws. Most latches have a nut for adjusting and if yours doesn’t open, close, and lock then you will have to loosen that nut and adjust.
Final checks for your pop-out windows
Before you put anything else back together, make sure the window operates as it should. Make sure it is tight when closed and isn’t too loose when open.
If anything such as speakers was removed, reinstall them. This is a great time to clean out any rocks, screws, or debris in the bottom of the door that has been rattling around. The last thing is the bottom door panel that can be put back in place.
Pulling windows out of your van may seem like a crazy thing to do yourself but it is actually a pretty easy job. If you plan and have all the parts and tools you need, it doesn’t take that long. I did my rear windows one evening and the next morning replaced the side door windows to break up the job. It can easily be done all at once for most DIYers.
That’s nice but you neglected to tell people ford only made these pop outs from 92-97. This article is aimed at ford econoline as obviously ..
The windows are obsolete and so are the latches and everything else. So unless you find a complete 92-97 ford van in a salvage yard- these are impossible to find.
Hey Mike, the process for changing your windows will generally be the same. This process was done on a Ford Econoline but the steps can be used as the basis for any camper van.
@Mike b I have two sets of popout windows and all the accompanying trim/hardware in my garage—they are not that difficult to find. Most of us reading a site like this will be accustomed to DIY’ing things, and likely having our eyes out for helpful bits like this. I pull them when I can, as they’re a valuable asset for people modding vans. Just keep your eyes peeled on JYs and FB marketplace.
Any info on how to do the large cargo windows to lift all the way open like the back of a canopy?