Sleep Comfortably With The Right Van Conversion Bed Platform
At 8 hours, the average person spends 1/3 of their life sleeping. For vanlifers, there are often some extra hours spent in your bed as it may double as your office or lounge area. So building a solid sleeping platform is a critical part of any van build. After all, you can’t just slip your old queen-size bed frame and headboard in there. Just because it’s a van, and a homemade bed, doesn’t mean it shouldn’t be solid and comfortable. This is especially true for full-timers or anyone doing long trips. Let’s look at how to build a sleeping platform for your van to ensure you’re well-rested for your next adventure.
As with all van projects, your sleeping platform requires proper planning to utilize the space and be roadworthy. Deciding how to build a sleeping platform will include planning, layout, material selection, and the actual build. The first step will be planning. Take your time here and make sure you have a design that will work best for you.
Planning How To Build a Sleeping Platform
Having a plan is always a good idea. This doesn’t mean you can’t steer away from it if you need to. However, setting your basic plan is the first step.
Your van and its floorplan will help determine how to build a sleeping platform. For example, is under-bed pull-out storage needed? Maybe it’s a multi-use space, and you need a sleeping platform that folds up out of the way.
Social media and online forums are full of ideas and builds other vanlifers have completed. Consider your needs and your living and/or travel situation when looking for inspiration. What looks good and works for someone else may not be best for you.
Take some measurements inside your van and sketch out your sleeping platform. With the dimensions confirmed, you can tape or mark out the project on the van floor. If this is a new build, don’t forget to consider the cabinets and anything else that will be directly beside the sleeping area.
A fun feature of vans, as anyone who has built one will know, is the fact that they are not square. There are also obstacles to work around everywhere! Your sleeping platform likely won’t’ be as simple as a perfect square or rectangle. Small notches, angles, and cutouts will be needed in most cases. Cardboard works great for transferring any angles to wood for cutting. Cheap contour gauges are also a great tool for quick cutting of notches.
Material Selection
There are many ways to build a sleeping platform and just as many materials to use. Metals are strong and can be lightweight but difficult to cut and work with. For people with basic tools and skillsets, metal probably isn’t going to be your first choice.
Aluminum can be more easily drilled and cut, and the option of bolting simplifies things over the welding. As sweet as a custom aluminum sleeping platform would be, most people will go another route.
Wood is the material most people will go to for this project. Can you build a sleeping platform out of used plastic milk crates? Sure, but again, wood will be the most popular choice. Lightweight, strong, easy to work with, and oh that smell of fresh-cut wood! Wood is readily available in lots of different sizes and is affordable. 2X3 boards are strong enough for this project, but 2x4s can be used as well. 2X2 boards are used in some projects and are the smallest you would want to go for support. We will refer to the framing material as 2×4, but it is interchangeable with whatever you choose.
When it comes to attaching hardware, consider screws over nails. Screws take a better hold and are easily removed if needed. It is important to think about the underside of the sleeping platform as well. Will, it will be used for storage and possible outdoor gear? Moisture, wet bins, or gear will rust quickly if galvanized, coated, or stainless options are not used.
How To Build A Sleeping Platform
With a plan in place and your material bought, it’s now time to get your hands dirty. As mentioned, different types of sleeping platforms can be built depending on your needs.
The two most common types of sleeping platforms are a fixed sleeping platform with space underneath for slide-out storage and one that converts from a bench to a bed. Both are easy to build and make smart use of space in your van. Wood can also be used for both.
Bed/Bench Combo
Having a permanent bed in your van is nice; however, it does take up valuable space while you’re not sleeping. A bed/bench combo is a multi-use design that frees up space and gives you a dedicated seating area.
A slat bed, shown in the video below, consists of two separate pieces that, when complete, mesh together and let you convert from one space to another with a simple pull or push.
The Stationary Part of The Frame
The first section will be the fixed bench piece. It will be a rectangle shape and dimensions that are comfortable for sitting and approximately half of the desired full size when in bed mode. Four pieces will make up the frame top with a leg in each corner. Adding an additional leg in the middle is a good idea for extra support.
Add The Slats
Slats can be made from thinner boards, such as 1x4s, to save weight. When deciding on frame size, consider the total width of all of your slat pieces to avoid having to make extra cuts. The slats will be fastened to the top of the frame. They will be spaced one board’s width apart plus an extra 1/2″ or so for easy sliding.
You can use a tile spacer, nail, drillbit, or anything the width of the space you want to leave between slats. The frame of the slide-out piece will have slats spaced to slide between the slats on the bench section. Blocks on the underside on the bench side of the slide-out slats will act as a stop when pulling the section out.
The Slideout Section
The frame for the slide-out section will not be the full size as the bench section is. It will be more like a small wall with slats extending from the top. A full-height 2×4 at each end with a 2×4 between the top and bottom will make up the frame. Keeping the bottom 2×4 up 1″ will eliminate any binding on an uneven floor. The front face of this section will likely be covered in boards or paneling. This will also provide strength to the panel. For visual instructions, refer to the video below.
How To Build a Sleeping Platform With Storage
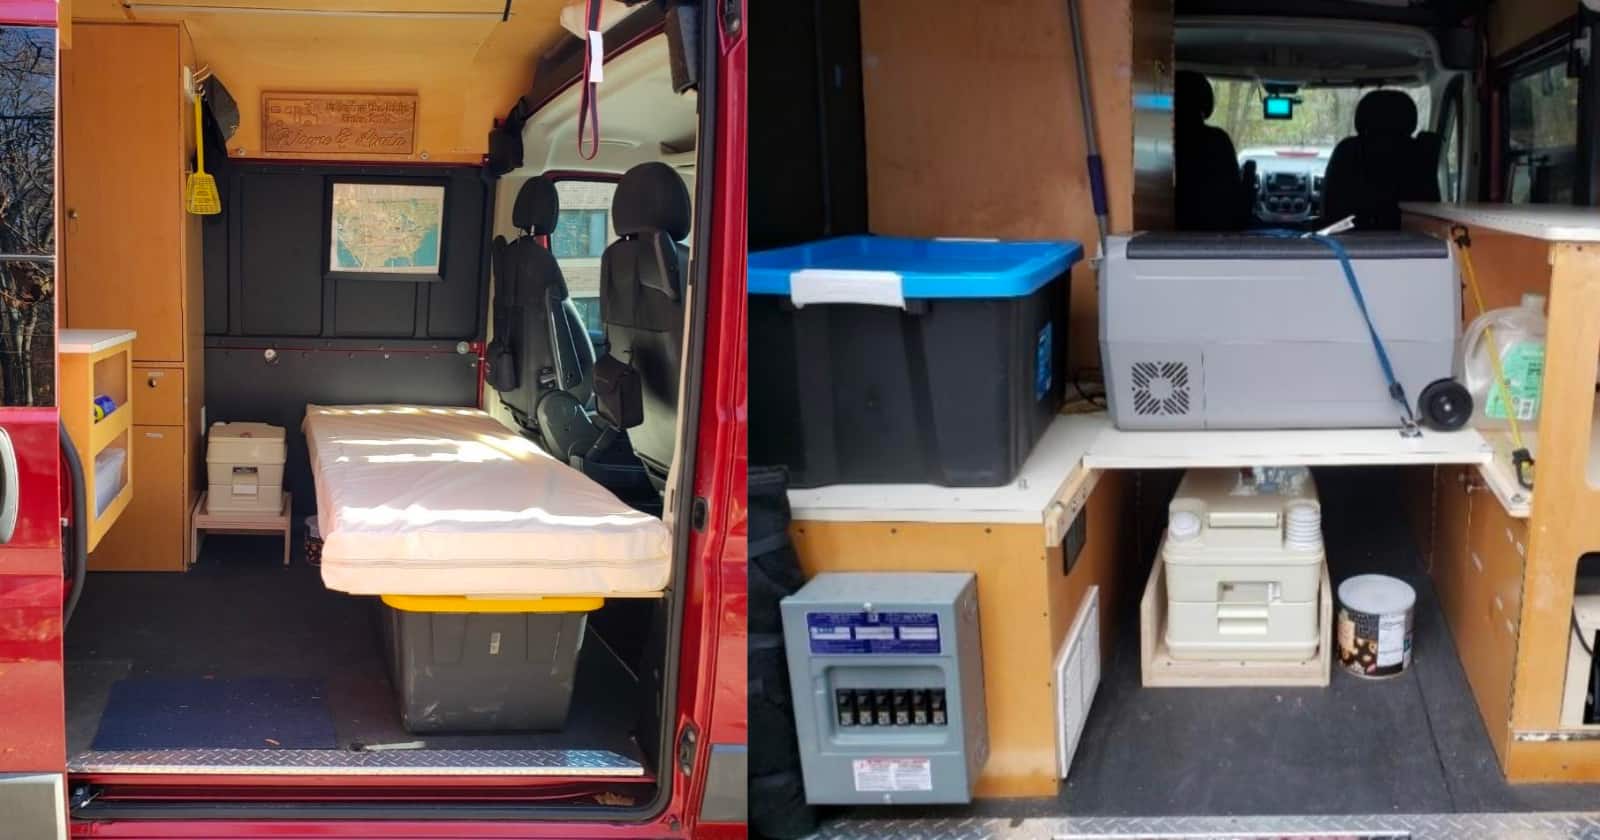
A permanent bed is a commitment space-wise, but it is so nice to have. You can wake up, make your bed… or not, and it is ready for you whenever it’s bedtime. The other benefit to having a fixed bed is the area underneath becomes a huge storage space. Accessible from two sides, you can store bins, have drawers, or hide laundry. This storage space in a van will be a big deal once you hit the road.
Building The Frame
How to build a sleeping platform with storage is simple. The frame will most likely be a rectangle, approximately the width of your van, and will extend from the back doors forward as far as you decide.
With your measurements for the length and width, you can start the frame by screwing together the two sides and two ends to form the perimeter.
Determine The Height
A leg at each corner, which can also be 2X4s, will determine the height. With these components together, you will have a visual of the full size before finishing it. If you want to make any changes, this is the time to do so. If you have bins, you want to use for storage, make sure the leg height is correct to use with your bins.
Add Strength With Wider Legs, Wood Glue, And Support For The Center
Using screws alone will allow for the removal of pieces if needed; however, adding wood glue will add strength and support to the joints. Another good idea is to add support around the legs. Rather than just fastening them to the frame on two sides, the legs can be boxed in by adding extra wood to the two open inside faces. Metal corner brackets are cheap and come in different configurations for added support.
4X4 material is also a good idea for the legs. It will give you a larger footing for more stability and also gives you more material to attach to.
For added support in the center of the bed, there are a couple of options. You can add a 2×4 running the length of the bed to split the frame in two and then add cross pieces similar to house floor framing. If you want to have the underside split in the middle for your store setup, you can add two pieces of 2×4 down the middle with a few 2×4 or 4×4 legs between them. This will add support to the center and provide you with an easy way to dived the space under the bed.
To provide a supportive surface for your mattress, add a piece of plywood to the top of the frame. It doesn’t have to be thick; keep it light. With the proper framing, support underneath the surface will be strong.
You can modify your storage area to have slide-out drawers or hinged doors when complete. This will help with organization and keep things from moving around while traveling.
Conclusion
Unless you plan on sleeping in a reclined van seat, you will have to decide how to build a sleeping platform. Choose a design that works with your van layout and your daily needs. If you plan properly, use quality materials, and take your time, you will have a usable space that will last the life of your van.
What van build topics interest you? Let us know in the comments.