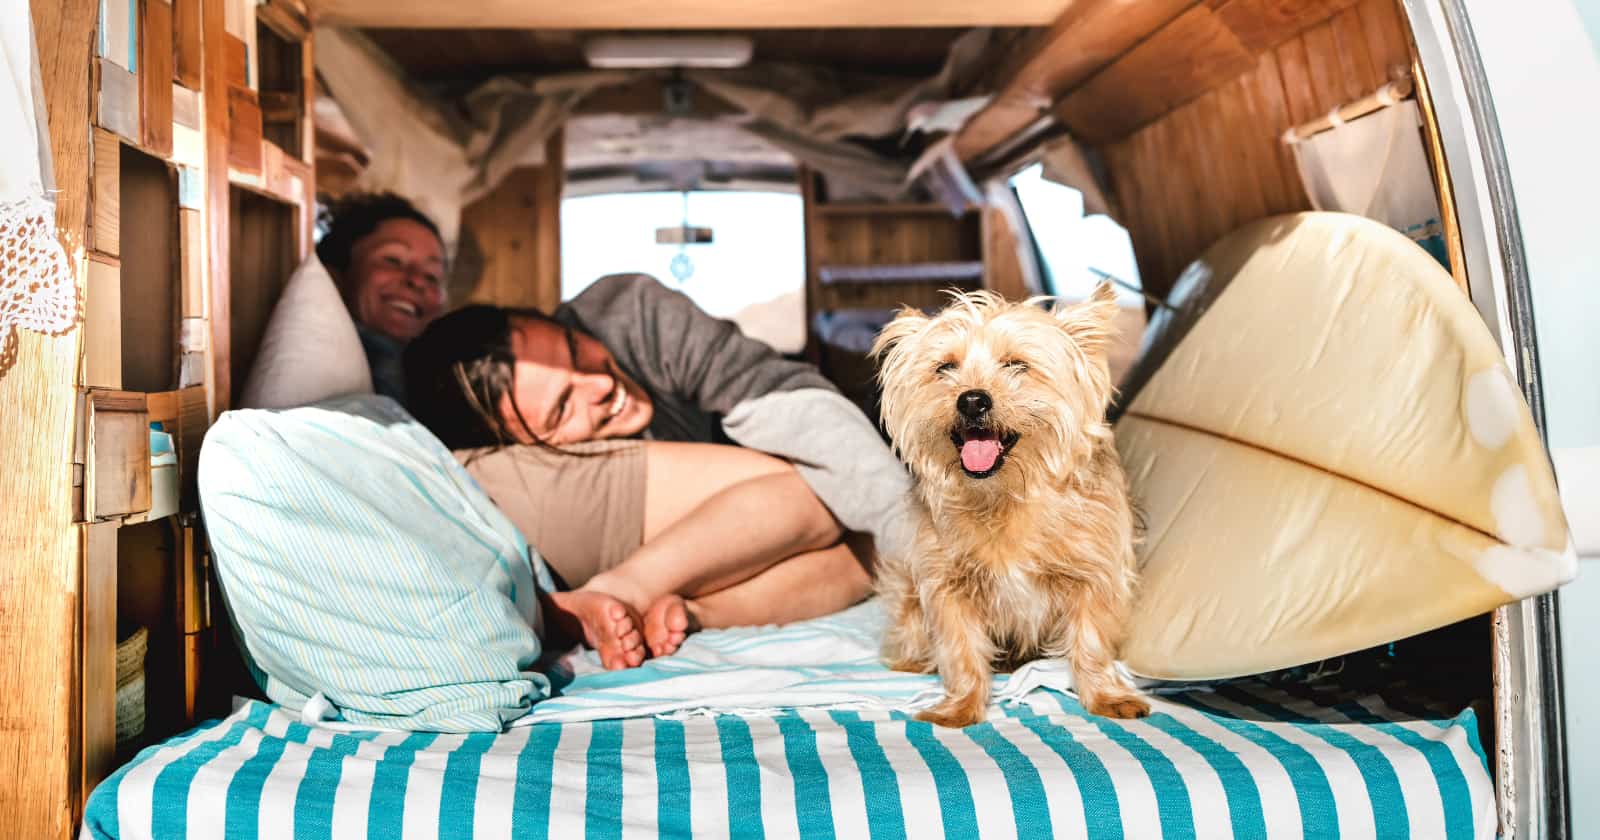
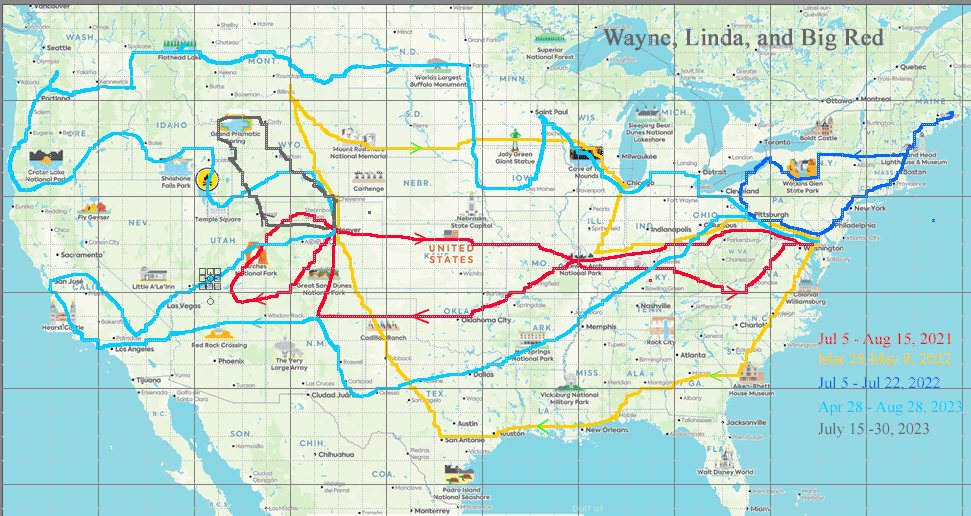
We are Wayne and Linda Smith of Glen Burnie, MD. We converted a Dodge ProMaster cargo van into our part-time retirement home on wheels six years ago. The best part of DIY is that when you want to make changes, you know how it was put together when it comes time for some van modifications. Our initial build was documented on doityourselfrv.com in 2017 and can be found here. It has economically met most of our traveling needs. After six years of use, we have taken many long trips covering 47 of the lower 48 states.
We made some changes to reflect lessons learned and created new problems! We also have some information to pass on that we wish we initially knew. This 18 foot van needed re-purposed space to better serve multiple requirements.
Things Will Break Down on The Way
The Rear Windows Had to Go
We recommend not purchasing rear windows in a van. We installed an aftermarket camera that is always on because even with the windows in the rear doors, the twin-door ‘pillar’ obstructs the vehicle directly behind you. The windows are now permanently covered with insulated covers. The camera has a 4”x 6” monitor that replaces the rear-view mirror.
An Important Safety Feature
We Installed after-market swivel seats. We had the sensor go out on the passenger seat, and the swivel mechanism was $2700 to replace! In addition, a dysfunctional swivel disables the airbag so that if you have an accident, the airbags will not deploy.
Knowing the Properties of Your Flooring Materials Is Important
Our waterproof floor expanded in direct sunlight, causing it to buckle. We routed a 1/8” groove down the middle as an expansion joint.
Automatic Steps are Better
Our fixed rear-running board has been great, but you might want to consider automatic electrical steps for the sides because they are wider for your feet.
Don’t Skimp on Your Inverter Quality
The single most important lesson we learned is that an induction burner requires a pure sine wave inverter when using batteries only! This is a crucial lesson for all DIYers!
The Main Goals of Our Van Modifications
During 2023, we experienced unexpected 100-degree days in MT and ND. Hotel prices soared, making camping more appealing to save money. In order to camp more often, we needed to:
- Keep both our illusion of space and real space to sleep, eat, change clothes, and open the door!
- Our original plan was to sleep on the floor until we tried it. We needed to sleep more comfortably and make and take down the bed quickly. When your vehicle is a ‘transformer,’ it cannot be both kitchen and sleeping space at the same time. You cannot make coffee until you convert back from sleeping. It took valuable time to roll up sleeping bags in a small space, but the major issue was ever-decreasing hand strength to stuff them in their covers.
- We decided we wanted to use real mattresses that could be easily set up and put away to make camping more enjoyable.
- We wanted a dining space we could slip into and out of easily.
- When we hung the magnetic screen door on the outside of the van, all the bugs got in before we finished!
- We needed support poles or handles to get in and out of the van.
- The 12” porta-potty was too short.
- We decided not to replace the induction burner due to cost.
Below, we will go into detail about the van modifications we made with photos.
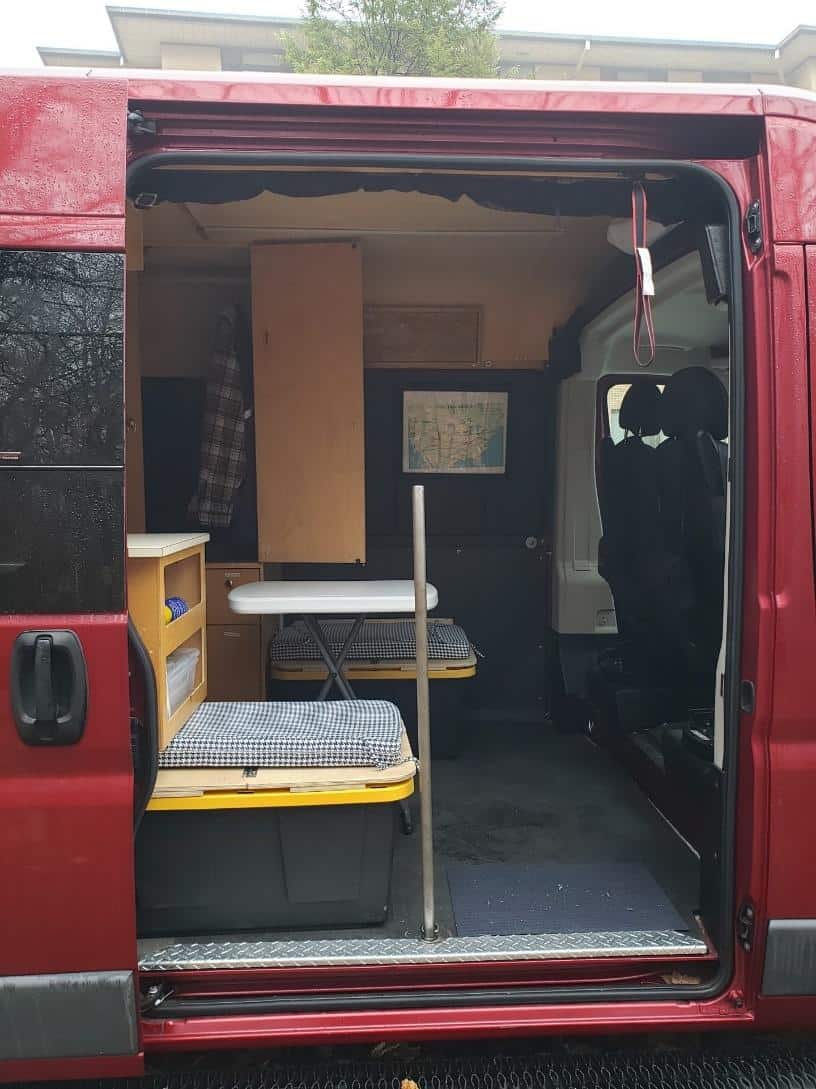
Road Configuration with Dining
Piano Hinges
Inspired by the homes designed by Frank Lloyd Wright, we’ve outfitted our cabinets with piano hinges. This upgrade allows the doors to swing open a full 180 degrees, providing complete access to the contents inside.
Totes as Storage and Seating
Two 27-gallon totes, easily accessible and packed with our food and reserve clothing, serve a dual purpose. Not only do they store our essentials, but they also provide sturdy seating. On top, a wooden platform ensures a flat surface, while 2” thick foam cushions offer a comfortable perch.
Pantry Space-Saver
To accommodate these totes, we’ve reconfigured the pantry next to the door, cutting down from four shelves to two. This alteration saves us a valuable 9 inches of door space – a premium in van life. Since we encounter grocery stores daily, the need for extensive storable food is minimal.
Portable Table
At the heart of our living space is a portable table designed for quick deployment for a meal or a game. When not in use, it tucks neatly away at the back of the van atop the mattresses. While not a van modification itself, it is convenient.
Custom Van Entry Aid
The standard D ring, once found on the floor by the sliding door, has been cleverly modified. We’ve welded the bolt to a pipe and reinstalled it to serve as a sturdy support, aiding entry and exit from our mobile abode.
Transforming the Space: Dining to Dreaming
Efficiency is key in van life; here’s how we morph from daytime lounging to nighttime slumber.

Converting Dining to Sleeping Area
When it’s time to switch from dining to sleeping, we start with the captain’s chairs, sliding them forward to clear the stage.
Storage Totes Turned Pedestals
The seats come off the totes, which are then placed behind the captain chairs, serving as the base for our bed.
Bed Platform Assembly
Our bed platform consists of four 18” x 27” plywood panels. Thanks to the piano hinges, they unfold to create a sleeping space of 72”x27”.
Steel Pole Removal
The steel pole, which supports us during the day, is unscrewed and set aside for the night.
Mattress Setup
On top of the totes and plywood, we lay out a 28”x72” foam mattress, completing bed number one.
Porta-Potti Accessibility
The porta-potty, usually at the rear, is rehoused in a box that inverts to elevate the toilet to a height of 18 inches, ready for use.
Ample Space Maintained
With the bed and toilet installed, there’s still plenty of room to move about, ensuring easy access in and out of the van.
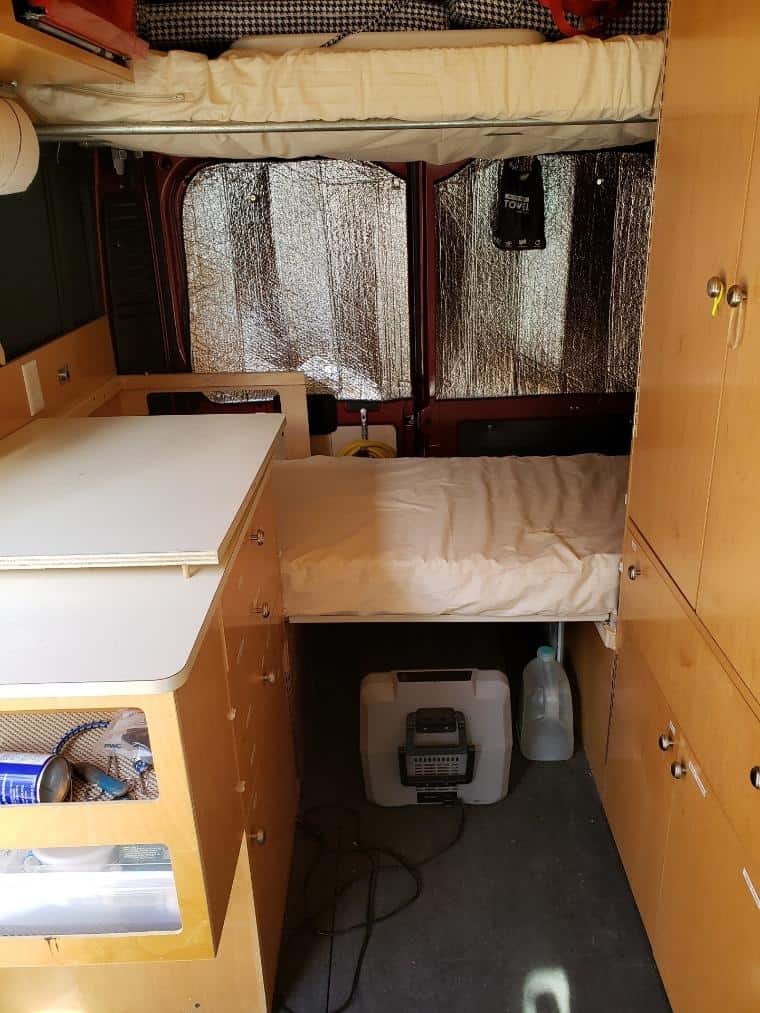
Rear View: Storage and Sleep Space
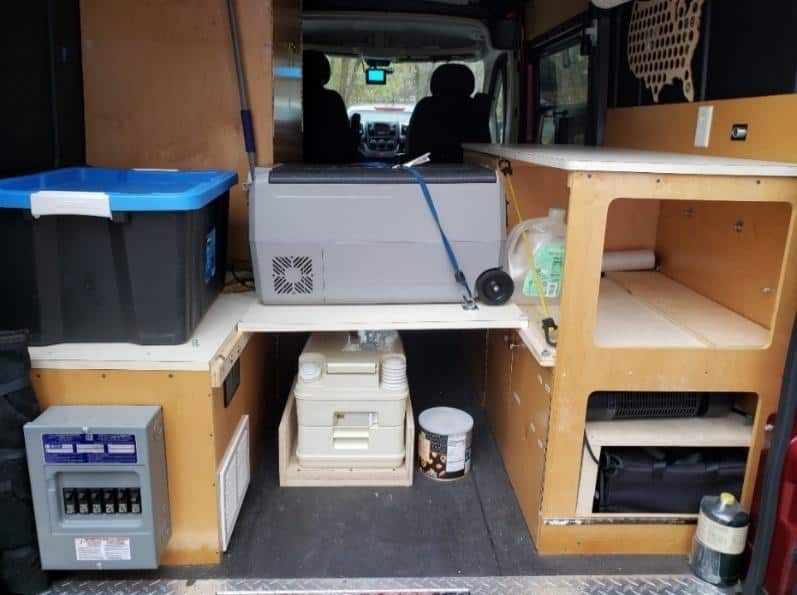
U-Shaped Efficiency
This perspective from the back, with both doors open, showcases our significant modifications. From the countertop down, this area serves not only as storage but also as our second sleeping zone. The original aisle has been transformed into an efficient U-shaped space.
Cooler and Porta-Potti Placement
- Cooler: It sits on what used to be the table from our 2017 article, now securely fastened across the lower cabinets.
- Porta-Potti: Stored conveniently underneath the cooler, it can be pulled forward into the van for use. Its rear door location allows for easy removal of the cassette for emptying. The new stand configuration is an upside-down version compared to pic B.
Essentials Storage
- Toilet Paper: Kept in a waterproof can to ensure it stays dry.
- Nighttime Arrangement: When the porta-potty is pulled forward at night, the cooler is then moved underneath the platform. We’ve also added 12v outlets on both sides of the van for convenience.
Reorganizing Personal Items
- Dirty Clothes Box: Now located either on the floor or the counter, taking the cooler’s previous spot.
- Backpack Storage: Placed in the cubby under the counter on the right. This reclaimed space offsets the loss of two shelves in the pantry and helps keep our gear organized.
Travel Mode: Rearward View
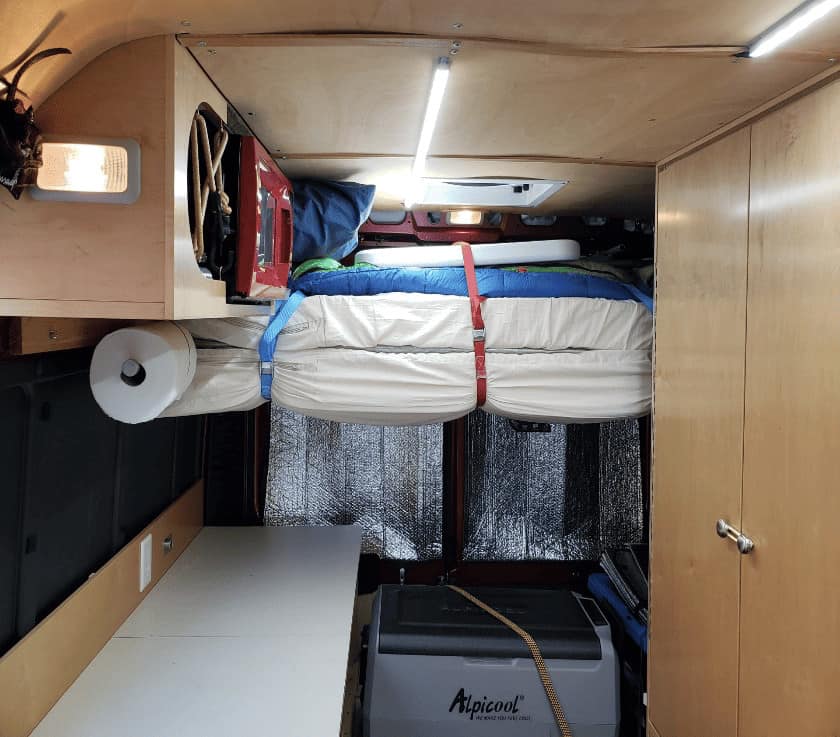
Cabinet and Mattress Storage
- Upper Cabinet: It had to be significantly shortened to make room for storing the mattresses.
- Cooler Access: Strategically placed inside the van for easy reach.
Overhead Storage Solutions
- Mattresses and Sleeping Bags: We cleverly use three ½” pipes for overhead storage. One mattress sits above these pipes while the other is tucked below. The sleeping bags are spread out on top of the upper mattress, eliminating the need to roll them up every day. The table is also folded up and strapped securely in place here.
Considerations for Bunk Beds
- Space Constraints: If you’re thinking about bunk beds, be aware that you’ll have only 27” of height, not counting mattress thickness. This could feel a bit too claustrophobic for comfort, reminiscent of sleeping in a submarine’s confines.
Mattress Selection
- Optimal Thickness: We opted for both a 5-inch and a 4-inch thick mattress, each 28” wide by 72” long. We found that the 4-inch mattress is not only sufficient but also easier to manage in the van’s compact space.
Back Door Functionality
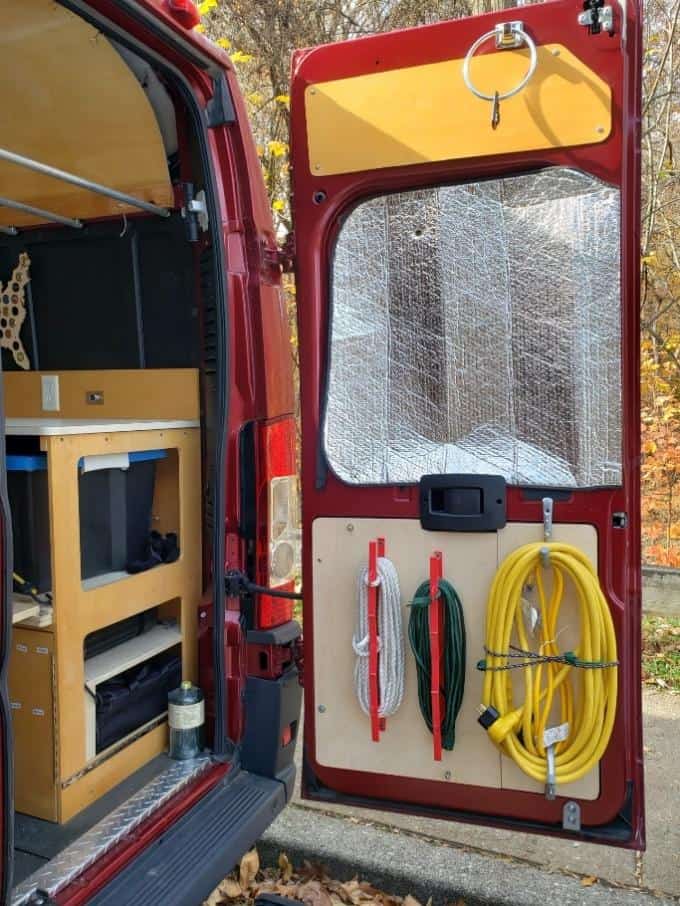
Window Covering
- Constant Coverage: The back door window remains covered most of the time, as explained earlier, rendering it more functional than observational.
Towel Rack and Cord Storage
- Practical Additions: The door is equipped with a towel rack on top, providing a handy spot for drying. Below, there’s a space dedicated to neatly storing electrical cords, ensuring they’re always within easy reach.
Rear Interior Reorganization for Sleeping
Porta-Potti and Cooler Rearrangement
- Porta-Potti Relocation: Now positioned next to the front bed, optimizing space usage.
- Cooler’s New Spot: Moved into the space where the porta-potty used to be, allowing for a more efficient layout.
Counter Adaptation for Bed Space
- Modifiable Counter: The counter has been modified so that the rear section can be removed, creating a van modification for an additional sleeping area.
Mattress Arrangement
- Sleeping Configuration: One of the mattresses is laid out across the space vacated by the cooler, creating an additional sleeping spot.
Morning Space Efficiency
- Room to Move: Despite the overnight arrangement, there’s still ample space available to comfortably move around and get dressed in the morning, before restoring the van to its daytime setup.
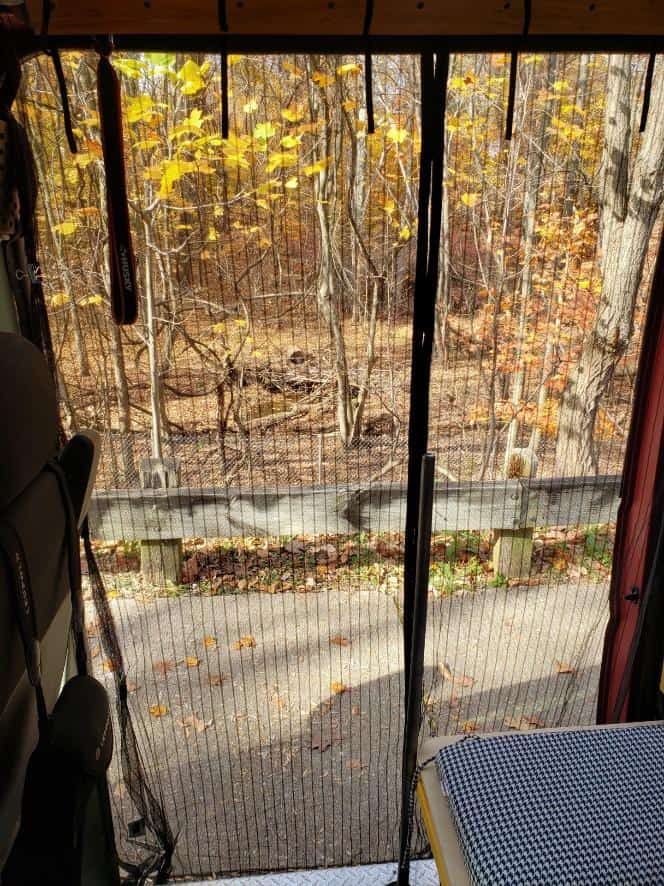
Screen Setup Process
Unfurling the Screen
- Overhead Storage: The screen is stored overhead and is unfurled from this location when needed (as shown in pic H below).
Securing the Screen
- Velcro Sides: It’s secured using Velcro on the sides. The design allows the bottom to hang out freely, eliminating the need for Velcro there.
- Tension Adjustment: To ensure a snug fit, gather any loose material at the sides. This creates tension, allowing the magnetic strips to meet in the middle for a secure closure.
Practical Tightening Solution
- Use of Binder Clips: Instead of sewing, we’ve opted for binder clips to tighten the screen. This choice allows for the clips to be easily rolled up with the screen, providing a simple yet effective solution.
Modified Interior Features
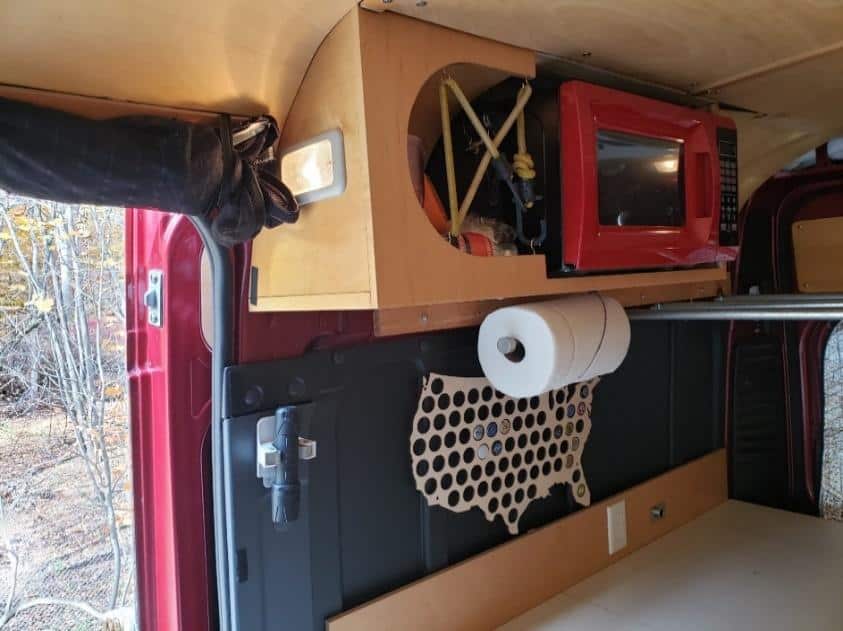
Cabinet and Microwave Adjustment
- Shortened Upper Cabinet: As shown in pic H, the upper cabinet has been shortened to accommodate changes.
- Microwave Placement: The microwave now resides in this shortened overhead cabinet, secured firmly with a ratchet strap to minimize movement, especially forward of the wheels.
Countertop Modification
- Maintaining Length: While we preserved the length of our countertop, it required a cut, as illustrated in pic F, to fit the new interior layout.
Screen Door Storage
- Convenient Roll-Up: The screen door, when not in use, is rolled up neatly and secured with Velcro, ensuring it stays out of the way yet easily accessible.
Added Touch: Flashlight Holder
- Practical Addition: Take note of the flashlight holder! A small but significant feature for added convenience.
Embracing the Journey of Custom Van Life
As our journey with our Dodge ProMaster conversion shows, transforming a cargo van into a cozy, functional home on wheels is not just about the destination but the adventure along the way. The process of DIY van conversion empowers you to tailor every inch of your space to your specific needs, and the lessons learned through trial and error are invaluable. From the practicality of choosing the right materials to the comfort of customizing your sleeping and dining spaces, every van modification we’ve made reflects our unique journey in embracing van life.
We hope our story inspires you to embark on your own van conversion project, and remember, it’s okay to make changes along the way. Each twist and turn is a chance to improve and adapt your home on wheels to your evolving travel lifestyle. So, whether you’re a seasoned RVer or just starting out, take these insights as a starting point for your own creative journey.
We’d love to hear about your experiences, challenges, and triumphs in van conversion and RV living. Share your stories in the comments below, and let’s continue to learn and grow together in this vibrant community of van lifers and DIY enthusiasts.
Happy travels and happy tinkering!